Track changes
Word has an editing feature called Track Changes. It functions differently in Word 2010 or Word 2007 (shown below) than it does in earlier versions of Word.
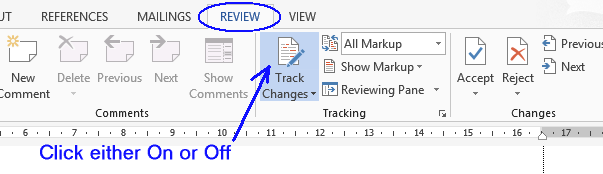
The Track Changes tool can be found under the Review tab in the main menu. By clicking on the Track Changes button, you can either turn it on or turn it off.
In the sample paragraph below, notice how the changes are indicated by a different color. Usually, insertions are underlined and deletions are marked with a strike-through. In addition, detailed information can be added in "call-outs" or as comments, in the margin area of the document.
Sample: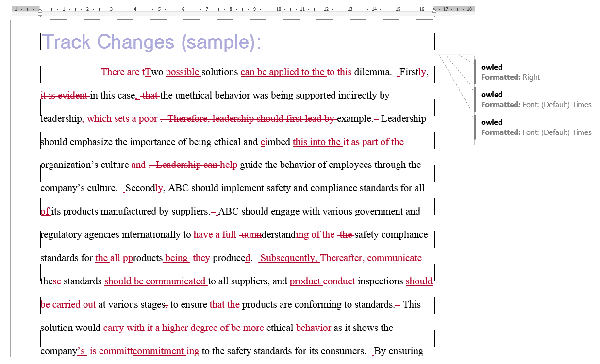
To review the changes from editing, you can use the different viewing options (shown below). In most cases, the Final view shows the cleaned-up version, and the Final Showing Markup view reveals the changes from editing. You can also compare the Original to the Final.

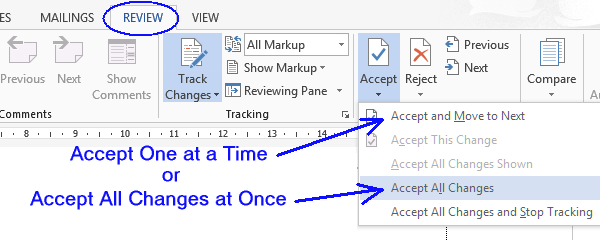
To review the editing, you can look at each and every change one-by-one, and decide whether or not to accept them. To remove All of the Tracks, and produce a Final document, you can Accept All changes. This may be irreversible; however, so you might want to make a copy of the document first.